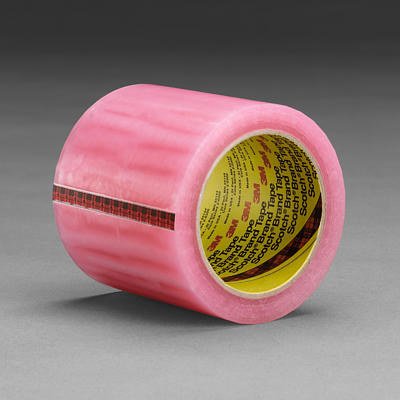
Scotch(R) Labelgard(TM) Film Tape 821 Pink, 4 in x 72 yd [PRICE is per ROLL]
Scotch(R) Labelgard(TM) Film Tape 821 Pink, 4 in x 72 yd [PRICE is per ROLL] Review
Scotch(R) Labelgard(TM) Film Tape 821 Pink, 4 in x 72 yd [PRICE is per ROLL] Feature
- Color: Pink
- Width: 4 IN
- Length: 72 YD
- Model: 821
- Sale Unit: ROLL
Scotch(R) Labelgard(TM) Film Tape 821 Pink, 4 in x 72 yd [PRICE is per ROLL] Overview
*Write-on surface accepts #2 pencils, ballpoint pens, and many markers *Used for protecting labels and shipping documents *Low-glare surface allows bar code scanning *Long-aging and UV-resistant tape construction
Scotch(R) Labelgard(TM) Film Tape 821 Pink, 4 in x 72 yd [PRICE is per ROLL] Specifications
Available at Amazon Check Price Now!
*** Product Information and Prices Stored: Jan 04, 2010 10:25:03
Warts Treatment and Removal
Warts are another disease that is caused by the Human Papilloma Virus or the HPV. This condition does not kill anyone, but is there any point in keeping these small benign growths on the skin and encouraging them to spread? Therefore warts treatment is necessary, though the fact remains that the warts may often go away on their own, but not before causing some damage.
Warts not only happen in adults, but are seen in children as well. Sometimes the virus passes from a mother to a new born child. Warts are contagious and so can spread from one person to another when someone directly touches the warts of the affected individual. And it can definitely spread through direct sex. Protection during sex such as wearing a condom may not be enough to stop an infiltration.
But even when there is no direct contact, the virus can still spread through towels, sharing clothing and also taking a bath in the same shower. Does the virus spread through kissing? There is no unanimity on this – some say it does, while others do not agree with them on this. Because of this, both for the affected individual and the people he comes in contact with, warts treatment is essential.
Warts can also bleed and itch. And even when they do not bleed, they can still come in line of clothing and cause a lot of irritation. These skin growths can also be quite embarrassing, particularly when they develop on the exposed portions of the skin. And so, why suffer - articularly when warts treatment can get rid of these growths quickly and effectively.
There are 3 main options…
• Home remedies
• Topical applications and medicines
• Surgical options
Home remedies include…
Adhesive Tape Therapy: Adhesive waterproof tapes are used to cover the warts for 6 to 12 days. In the area under the tape the virus cannot grow, and when after 6 to 12 days the tape is removed, the growth is significantly less, if not completely gone.
Salicylic Acid Therapy: This is basically a liquid or a plaster that is used to cover the wart tissue. But before it is applied, the area needs to be soaked with warm water and razored down slowly. The acid is applied only after this.
There are now some very fine topical application medicines that can give wonderful results. Many of these applications have been scientifically developed using natural ingredients and are free from chemical fertilizers, herbicides and pesticides. Having almost no side effects, they offer quick results and are safe as well.
Surgery is a third option, but this can only be considered when the warts are relatively bigger and warts treatment is difficult or impossible through the conventional warts treatment methods.
Jen Carter is team member and writes regularily about warts treatment, warts facts and other common conditions for Amoils.com.
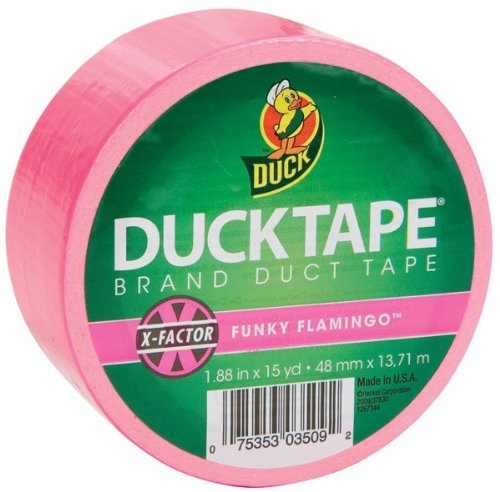
Duck Brand Colored Duck Tape, 1.88 Inches x 15 Yards, Funky Flamingo (1265016)
Duck Brand Colored Duck Tape, 1.88 Inches x 15 Yards, Funky Flamingo (1265016) Review
Duck Brand Colored Duck Tape, 1.88 Inches x 15 Yards, Funky Flamingo (1265016) Feature
- Great for any repair anywhere
- Ideal for craft applications, coordinating repairs, and color-coding materials
- Tears easily by hand without curling and conforms to uneven surfaces
- Excellent adhesion to a wide variety of surfaces like cloth, vinyl, leather, plastic, metal and laminates
- Each roll is 15 yards long
Duck Brand Colored Duck Tape, 1.88 Inches x 15 Yards, Funky Flamingo (1265016) Overview
Almost everyone has a Duck Tape story to tell, usually praising its remarkable strength and versatility. Duck Brand Duck Tape has a wide range of applications, both traditional and nontraditional, and is now available in over 18 colors and patterns, making it even more useful than ever! Because of its strength and adhesive properties, you can use Colored Duck Tape for almost any job, including everyday household and auto repairs--anywhere a flexible and weather-proof bond is needed. Colored Duck Tape is great for coordinating materials, color-coding and identification, craft applications, and more. This heavy duty tape is cotton mesh reinforced, but still easy to tear! Duck Tape conforms to both smooth and uneven surfaces, and can be used on materials such as cloth, vinyl, leather and plastic - even metal and laminates. Each roll contains 1.88 inches x 15 yards of Funky Flamingo pink tape. Duck tape is great for any repair - anywhere!
Duck Brand Colored Duck Tape, 1.88 Inches x 15 Yards, Funky Flamingo (1265016) Specifications
Available at Amazon Check Price Now!
*** Product Information and Prices Stored: Jan 01, 2010 09:50:05
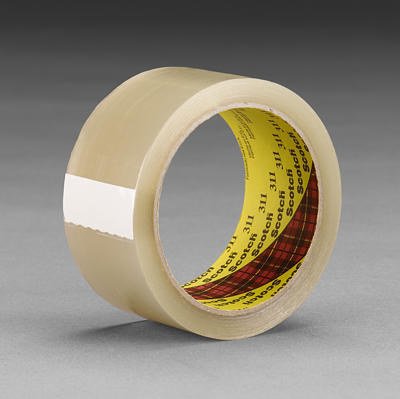
Scotch(R) Box Sealing Tape 311 Clear, 72 mm x 100 m [PRICE is per ROLL]
Scotch(R) Box Sealing Tape 311 Clear, 72 mm x 100 m [PRICE is per ROLL] Review
Scotch(R) Box Sealing Tape 311 Clear, 72 mm x 100 m [PRICE is per ROLL] Feature
- Color: Clear
- Width: 72 MM
- Length: 100 M
- Model: 311
- Sale Unit: ROLL
Scotch(R) Box Sealing Tape 311 Clear, 72 mm x 100 m [PRICE is per ROLL] Overview
Good aging in sunlight and fluorescent light. Holds through wide temperature swings, specifically in colder and damper environments. Biaxially oriented polypropylene backing is easy to handle and dispense. Resists abrasion, moisture, chemicals, and scuffing. Conforms around edges and over rough surfaces for a tight seal. Good edge tear and split resistance. Standard width: 48 mm
Scotch(R) Box Sealing Tape 311 Clear, 72 mm x 100 m [PRICE is per ROLL] Specifications
Available at Amazon Check Price Now!
*** Product Information and Prices Stored: Dec 31, 2009 01:10:04
How To Make A Scrapbook
If you are new to crafting and wanting to find out how to make a scrapbook then this article has been written especially for you. Scrapbooking has become increasing popular in the last decade and is a way of recording and preserving keepsakes and pictures that can be enjoyed by generation after generation.
How to make a scrapbook - Equipment needed.
The scrapbook - The most important part is the scrapbook itself. Try to find a book that is top loading as this will stop your pages from falling out when being stored upright. Scrapbooks come is a huge range of styles and themes.
Paper and card stock - acid and lignin free cardstock, paper, vellum etc
Adhesive - make sure that any adhesive used is photo safe. There are many different types of adhesive including double sided tape, sticky dots and spray glue.
Cutting Materials - a craft knife is essential and a really sharp pair of scissors. You may decide to invest in a paper trimmer however you can use your craft knife and metal edge ruler to cut straight lines.
How to make a scrapbook - Embellishments
Embellishments are used to decorate scrapbook page layouts and come in many different forms including stickers, eyelets, brads, ribbon, buttons, wire, charms, stamps and rub ons. You can also purchase machines that will cut shapes so that you can create your own embellishments.
How to make a scrapbook - Preparation
To begin making your scrapbook you firstly need to decide on the theme. You can create scrapbook page layouts for all kinds of events such as weddings, birthdays, parties, pets and holidays.
How to make a scrapbook - Process
Begin by selecting the pictures you wish to place on your scrapbook page layout. Choose one picture to be the focal point of the page and use the colors in the picture to determine the color scheme of the whole page.
Decide what journaling you are going to add and mount the pictures on coordinating paper. Lay out your scrapbook page layout before fixing it together permanently. Once you are happy with the design fix the pictures to the page using your adhesive.
Once the wording and pictures are in place you can then decorate the page using brads, ribbon, paper, eyelets and rub ons.
One of the most important things to remember when creating scrapbook page layouts is not to over do them, remember they will need to be placed into a thin plastic sleeve so attaching bulky embellishments simply wont work and will look unsightly in your scrapbook.
And lastly and most importantly always use products that are acid and lignin free, using anything else will cause your pages to deteriorate over time.
Vicki Churchill writes for a site that specializes in Scrapbook Ideas. providing you with excellent tips and ideas on How To Make A Scrapbook She also specializes in Card Making.
3M 00021200042751 361 2"x60yds White Glass Cloth Tape
3M 00021200042751 361 2"x60yds White Glass Cloth Tape Review

3M 00021200042751 361 2"x60yds White Glass Cloth Tape Feature
- Package Quantity: (1) 60 Yard Roll
- Type: Glass Cloth Tape
- Width (Inch): 2
- Color: White
- Length (Yards) (Yards): 60
- Thickness (mil): 7.5
- Tape Number: 361
3M 00021200042751 361 2"x60yds White Glass Cloth Tape Overview
Glass Cloth Tapes Type: Glass Cloth Tape Width: 2 Color: White Length (Yards): 60
3M 00021200042751 361 2"x60yds White Glass Cloth Tape Specifications
Available at Amazon Check Price Now!
*** Product Information and Prices Stored: Dec 27, 2009 20:45:03
Duct Tape
Search through any tool kit, and a common item found is duct tape. This strong, multi-purpose adhesive tape, usually measuring 1.88 inches wide, has evolved from its original purpose of joining together broken equipments. It is now a much sought-after material for creating novelty articles and fashion items, including a classy tuxedo. Duct tape is available in a wide range of colors. Transparent tapes are also available. Duct tape is often called ‘the ultimate material’ owing to its strength and versatility.
Duct tape was developed during the Second World War as a waterproof tape for sealing ammunition cases. It was called “duck tape” because of its water resistance quality. The army gradually widened its usage by utilizing it for fixing military equipments, guns, vehicles and even parts of aircrafts. The housing boom following the war saw duct tape being used for a variety of repair work. An important use of the tape was fixing air conditioning and heating ducts. This earned the tape its present name, duct tape.
Duct tape’s strength and versatility were famously displayed during the Apollo 13 mission of 1970. Following an explosion, the spacecraft’s lunar module had to be used as a lifeboat for saving the onboard astronauts. The spacecraft’s carbon dioxide filters had to be modified to fit round the lunar module’s receptacles. A workaround solution was made using duct tape and other materials available on board.
Although duct tape’s strength lies in its ability to hold together materials and broken parts, creative people have found a variety of other uses. Craftsmen and designers use duct tape to create a range of decorative objects and accessories such as handbags, wallets, purses, belts and even formal wear. There are even exclusive duct tape handbags belonging to famous fashion labels. Perhaps the most diverse use was reported in a medical paper published in October 15, 2002, that states that the duct tape is effective in treating warts.
Duct Tape provides detailed information on Duct Tape, Duct Tape Crafts, Duct Tape Wallets, Duct Tape Fashion and more. Duct Tape is affiliated with Electrician Jobs .
Hook & Loop, Gripper Strip, Sew On-Loop, 1" Knitted Nylon Base, White 25' Length
Hook & Loop, Gripper Strip, Sew On-Loop, 1" Knitted Nylon Base, White 25' Length Review

Hook & Loop, Gripper Strip, Sew On-Loop, 1" Knitted Nylon Base, White 25' Length Feature
Hook & Loop, Gripper Strip, Sew On-Loop, 1" Knitted Nylon Base, White 25' Length Overview
In the Hook and Loop fastening field, Gripper Strip is a strong, lightweight and versatile development, available in the familiar Sew-On style, and with Pressure Sensitive backing for use on surfaces that cannot be sewn.
Hook & Loop, Gripper Strip, Sew On-Loop, 1" Knitted Nylon Base, White 25' Length Specifications
Available at Amazon Check Price Now!
*** Product Information and Prices Stored: Dec 25, 2009 02:30:03
Honey - Natural Treatment for Wounds and Burns
Honey is a highly concentrated sugar solution produced by honeybees. It is commonly used as substitute for sugar or a flavor enhancer. But other than that, honey is also effective in treating burns and wounds and it has been used for this purpose for many centuries. Now it is known that the secret of honey lies on its antibacterial activity.
How Can Honey Stop Infection?
We know that bacteria love sugar, but why most bacteria and other microorganisms cannot grow or reproduce in honey? Here are the reasons:
- Acidity - Honey is acidic, and acids prevent the growth of bacteria.
- Hydrogen Peroxide - When honey is applied as a wound dressing, it is diluted with fluids from the damaged tissue and combines with an enzyme added by the bee to form hydrogen peroxide, the same antiseptic found in drugstores. Diluted honey can serve as an excellent antiseptic because the naturally occurring hydrogen peroxide won’t harm the tissues and no scarring will occur.
Applying Honey as a Wound Dressing
- Usually, 20 ml of honey (25 - 30 g, 1 ounce) is enough on a 10 cm X 10 cm (4 inch X 4 inch) dressing. The honey dressings should be cut to a size that extends beyond the edges of the wound.
- To prevent honey oozing out from the wound dressing, waterproof dressings are needed. Absorbent dressings are not recommended as they soak the honey making it less effective. Adhesive tape or bandages can be used to hold the dressings in place.
- It is better to spread the honey on the dressing first before applying it on the wound area.
- If there are abscesses in the wound area, fill it with honey before applying the dressing pad, so that there is honey in contact with the wound.
- The amount of honey required on the wound depends on the amount of fluid it exudes. Honey will be useless if it is diluted by large amounts of fluid. Also the frequency of dressing changes depends on how fast the honey is being diluted by fluid.
- On deeper infections, more honey is required to get an effective antibacterial activity.
- Daily dressing changes up to three times daily may be needed.
- Exudation of fluid should be reduced after few days use of honey dressing. During this time, less dressing changes will be needed.
Honey Used as Medicine
Below are some common problems which can easily be prevented from the use of honey:
- Allergies - Raw honey is an excellent treatment for 90% of allergies.
- Anemia - Honey is a great blood enricher. The darker the honey the better. Take 1 ripe banana with 1 tablespoon of honey, 1-2 times a day.
- Appetite - Honey improves appetite in children suffering from appetite loss.
- Conjunctivitis - Dissolve honey in equal amount of warm water. When cooled, apply as lotion or eye bath.
- Fatigue and exhaustion - Honey is the best ingredient to remove tiredness and fatigue almost instantly because it is easily absorbed in the blood. Dissolve 1 teaspoon of honey in warm water or quarter honey balance of water in a jug and keep in the fridge.
- Headaches and Migraine - Take 2 teaspoons at meals to prevent headache. For migraines, take 1 dessertspoon of honey dissolved in a half glass of warm water. Repeat in 20 minutes if migraine persists.
- Heart Diseases - Honey can fight against cholesterol. Pure honey taken with foods daily instead of sugar relieves complains of cholesterol. This is helpful for old people, especially sufferers of diabetes, heart disease, high blood pressure and others.
- High Blood Pressure - Take mixed 1 teaspoon of honey, 1 teaspoon of ginger juice and 1 teaspoon of cumin powder 2 times a day.
- Insomnia (Sleeplessness) - Take 1 teaspoon of honey mixed in lukewarm water or milk and drink before going to bed.
- Poor Digestion - Mix 1:1 honey with cider vinegar and dilute with water.
- Skin - Honey is a good moisturizer. It also helps in reducing skin problems like pimples.
- Sore Throat - Let 1 teaspoon of honey melt in the back of the mouth and trickle down the throat.
- Stomachache - Take 1 teaspoon of honey, juice of a ½ lemon with a hot glass of water first thing in the morning.
- Teeth - Although honey is sweet, it helps to maintain and protect teeth.
Important: Honey contains a certain bacterium that might be harmful in infants; it should never be fed to children younger than one year old. Otherwise it could lead to food poisoning.
Now you know that when honey is applied properly to a wound, it can promote healing just as good as or often better than, over-the-counter ointments and dressings. It is also a great preventive medicine on common ailments.
About The Author:
Junji Takano is a Japanese health researcher and has been studying the causes of viruses since 1960s. In 1968, he invented Pyro-Energen, the first electrotherapy device that eradicates viral diseases in a non-narcotic way.
Visit him at: http://www.pyroenergen.com
Free newsletter: http://www.pyroenergen.com/newsletter.htm
DIY Flooring - How to Install Carpet
One of the most daunting DIY flooring projects is installing carpet. Many people are intimidated by the thought of installing carpet, feeling that it is beyond their abilities. This is in large part due to the special tools required. However, installing carpet is actually a fairly easy DIY flooring project and by doing it yourself, you can save a great deal of money in installation costs.
Tools Installing carpet does require some specialty tools. These include a knee stretcher, power stretcher, seam iron, seam roller, wall trimmer, and stair tool. However these tools can be rented from your local rental store. This is much more cost effective than purchasing the tools.
You will also need a carpet knife, hammer, tack strips (also referred to as tackless strips), staple gun or hammer stapler, and carpet seam tape.
Preparing Floor It is very important to prepare the floor properly before installing carpet. Carpeting can be installed over cement, wood, or linoleum. However, if the flooring is damaged, it is best to remove or replace the damaged subfloor. Take this time to repair any squeaks in the floor due to loose boards.
The subfloor should be cleaned thoroughly before installing your carpet. You don't want any dirt or debris underneath which can damage the padding and carpet. You should remove any floor registers and if you have doors which swing into the room, it is easier to remove the doors rather than try to work around them.
Installing the Padding Before installing the padding, you will need to install tack strips along the edges of the walls and around floor register openings. Do not install the tack strips in front of door openings. These strips should be installed about 1/4" from the wall with the tacks leaning towards the wall. Most tack strips will already have nails in them for nailing to the flooring. If you have a cement floor, you may need to glue the strips down using a masonry adhesive.
The next step is to roll out your padding, starting along one wall. Overlap the tack strips by approximately 3-4 inches, making sure the padding remains smooth and straight without bunching. Use a staple gun or hammer stapler to staple the padding to the carpet, placing a staple every 6 inches or so. If you have a cement floor or do not want to damage the underlying floor, you can use adhesive to installing the padding.
You can use duct tape along the seams to help keep them from bunching when you install the carpet. When you have completed the padding installation, use a utility or carpet knife to cut the padding along the tack strips, making sure that the padding does not overlap the strips. Cut out any floor register openings along the tack strips as well.
Installing Carpet Roll the carpet out in the room, again starting along one wall and leaving 3-4 inches of overlap along the walls. Make sure to keep the carpet straight and be careful not to allow any of the padding to bunch up under the carpet. Cut out the floor register openings, also leaving a couple inches of overlap over the tack strips.
If you have more than one section of carpet, you will have to create a seam. Place seam tape beneath the seam with the adhesive side up. Heat your seam iron and then starting at on wall, place the iron directly onto the seam tape until the adhesive melts and press both edges of carpet onto the tape. Use a seam roller or other smooth heavy object to press the seam together and into the adhesive. Follow this process along the entire seam, doing a small section at a time.
Starting in one corner, use the knee stretcher to install the carpet to the tack strip. Place the head of the kicker a few inches from the wall and kick the pad sharply with your knee. Repeat this process every 6-8 inches along the wall. Once that is complete, we will use the power stretcher to install the carpet along the other walls. Place one end of the power stretcher along the wall you just completed and the head of the stretcher along the opposite wall, about 4-6 inches from the wall. When you push the lever down, the carpet is stretched over the tack strips. Repeat this along the entire wall as well as the remaining walls. Use the knee kicker to stretch the carpet over the tacks along any floor register openings.
When the carpet has been attached to all of the tack strips, use the wall trimmer to cut the excess carpeting along the wall. This will keep the edges straight and gives us a close cut. Using a stair tool or stiff putty knife, tuck the edges of the carpet underneath the baseboard along the wall.
Finally, install door edge strip in doorways to cover the carpet edge and make a transition into the next room. Replace your register covers and you are done!
As you can see, installing your own carpeting can be fairly easy if you have the right tools and instructions. So when you are getting ready for your next DIY flooring project, don't shy away from carpeting due to installation costs. Install it yourself and save some money!
Kristin J. Yates