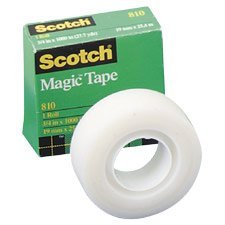
Scotch(R) Magic(TM) Tape 810, 1 in x 2592 in, Boxed [PRICE is per ROLL]
Scotch(R) Magic(TM) Tape 810, 1 in x 2592 in, Boxed [PRICE is per ROLL] Review
Scotch(R) Magic(TM) Tape 810, 1 in x 2592 in, Boxed [PRICE is per ROLL] Feature
- Model: 810
- Sale Unit: ROLL
Scotch(R) Magic(TM) Tape 810, 1 in x 2592 in, Boxed [PRICE is per ROLL] Overview
Scotch(R) Magic(TM) Tape. Keep the productivity on a roll with Scotch(R) Tapes. Mend it, seal it and secure it with this permanent transparent tape. Non-yellowing tape disappears when applied, and stays invisible over time. Can be written on. No. 810: 1 inch core comes in 36 yd. rolls in 1/2 inch and 3/4 inch widths; 3 inch core comes in 72 yd. rolls in 1/2 inch, 3/4 inch and 1inch widths. No. 104: 1/2 inch x 450 inch; No. 105: 3/4 inch x 300 inch - in refillable dispensers. Related Products: Scotch(R) Designer Tape Dispenser C-4210, Scotch(R) Desk Dispenser C-38 and Scotch(R) Desk Dispenser C-40.
Scotch(R) Magic(TM) Tape 810, 1 in x 2592 in, Boxed [PRICE is per ROLL] Specifications
Available at Amazon Check Price Now!
*** Product Information and Prices Stored: Mar 18, 2010 06:20:04
Windshield Safety & Replacement Auto Glass
There is a lot of talk online about the 20/20 report on windshield safety that aired on February 25, 2000. It is shocking at how some auto glass installers are willing to risk your life - only to save a few minutes of their time. That is not the case with all auto glass installers - rest assured.
However, your replacement auto glass could be a risk, and you may not even know it. When getting windshield or window repair there are some things you need to know. Did you know that even if you wear your seatbelt and have a properly functioning airbag, without a windshield firmly bonded to your car, any safety precautions are worthless?
Your factory-installed windshield prevents the car's roof from caving in and deflects your airbag. An improperly installed windshield is likely to come out during an accident - just when you need its protection most. It has been said by experts that millions of replacement auto glass is not installed properly - as many as seven out of ten.
What can you do to ensure a safe windshield installation or window repair? Choose an auto glass company that values your safety, not savings a few dollars.
Educate yourself and ask questions. Pick a shop that is well established and stands behind their work.
Some common auto glass replacement common mistakes:
Not wearing disposable rubber gloves when handling auto glass Oils and dirt from the installers' hands can contaminate the bonding service of the windshield.
Not properly preparing the pinch weld, causing it not to bond fully. We recommend that your technician inspect the pinch weld and make sure that it is clean and free of scratches. If scratches are present the technician should eliminate exposed metal with a primer.
Not cleaning the auto glass properly or wiping it down with a dirty rag. This dirt can contaminate the auto glass bonding surface.
Your technician should discuss with you the adhesive used and the time it takes for it to properly bond the auto glass to your vehicle. This lets you make an informed decision as to when you feel the car is safe to drive.
Using butyl tape instead of urethane. Butyl tape is an inferior adhesive, only holding to 60lbs per square inch. Urethane, by contrast, holds to 600lbs per square inch.
One last tip: Chips can be repaired through window repair services, however they often will turn into full blown cracks requiring you to replace the windshield. If you choose to repair a crack, please do it right away to keep it from getting contaminated.
Desert Breeze Glass was established in April 2001 by Cathryn Scheeler. We pride ourselves in great customer service and quality. We can meet all your auto and home needs whether it is a replacement windshield, window tinting, table top glass, mirrors, and much more. For more information check out our website at http://www.desertbreezeglass.com/
3M 00051131068841 3750p 2"x6" Clr 1000pk 3m Box Sealing Tape
3M 00051131068841 3750p 2"x6" Clr 1000pk 3m Box Sealing Tape Review
3M 00051131068841 3750p 2"x6" Clr 1000pk 3m Box Sealing Tape Feature
- Package Quantity: (1) 1000 Pack
- Tape Number: 3750-P
- Thickness (mil): 3.1
- Width (Inch): 2
- Width (mm): 48mm
- Color: Clear
3M 00051131068841 3750p 2"x6" Clr 1000pk 3m Box Sealing Tape Overview
ScotchPad™ High Performance Tape Strips Tape Number: 3750-P Thickness (mil): 3.1 Width: 2, 48 mm Color: Clear
3M 00051131068841 3750p 2"x6" Clr 1000pk 3m Box Sealing Tape Specifications
Available at Amazon Check Price Now!
*** Product Information and Prices Stored: Mar 15, 2010 19:05:04
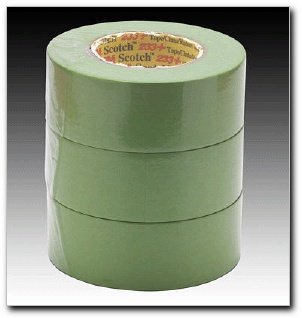
Scotch(R) Performance Masking Tape 233+, 48 mm x 55 m [PRICE is per ROLL]
Scotch(R) Performance Masking Tape 233+, 48 mm x 55 m [PRICE is per ROLL] Review
Scotch(R) Performance Masking Tape 233+, 48 mm x 55 m [PRICE is per ROLL] Feature
- Color: Green
- Width: 48 MM
- Length: 55 M
- Model: 233+
- Sale Unit: ROLL
Scotch(R) Performance Masking Tape 233+, 48 mm x 55 m [PRICE is per ROLL] Overview
This unique, green colored tape has excellent conformability, Transfer resistance, and is resistant to bleed through. 233+ is also has better UV resistance than traditional masking tapes. Adhesion to steel: 38oz./in.width. Tensile: 25lbs/in. Tape thic
Scotch(R) Performance Masking Tape 233+, 48 mm x 55 m [PRICE is per ROLL] Specifications
Available at Amazon Check Price Now!
*** Product Information and Prices Stored: Mar 14, 2010 15:05:04
3M 00021200030352 356 6"x72yd Clr 3m Label Protection Tape
3M 00021200030352 356 6"x72yd Clr 3m Label Protection Tape Review
3M 00021200030352 356 6"x72yd Clr 3m Label Protection Tape Feature
- Package Quantity: (1) 72 Yard Roll
- Tape Number: 356
- Thickness (mil): 2.0
- Length (Yards) (Yards): 72
- Width (Inch): 6
- Color: Clear
3M 00021200030352 356 6"x72yd Clr 3m Label Protection Tape Overview
Label Protection Tape Tape Number: 356 Thickness (mil): 2.0 Length (Yards): 72 Width: 6 Color: Clear
3M 00021200030352 356 6"x72yd Clr 3m Label Protection Tape Specifications
Available at Amazon Check Price Now!
*** Product Information and Prices Stored: Mar 13, 2010 08:15:05
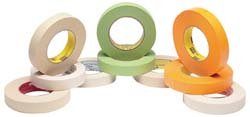
3M 00021200445576 1/2" X 60 Yard 3m Perform Masking Tape
3M 00021200445576 1/2" X 60 Yard 3m Perform Masking Tape Review
3M 00021200445576 1/2" X 60 Yard 3m Perform Masking Tape Feature
- Package Quantity: (1) 60 Yard Roll
- Masking Tape Type: Tape
- Masking Tape Style: Heat & Solvent Resistant Masking Tape
- Color: Tan
- Width (Inch): 1/2
- Width (mm): 12mm
- Length (Yards) (Yards): 60
- Length Meter: 55
- Tensile Strength (Pounds): 26
- Thickness (mil): 8.5
3M 00021200445576 1/2" X 60 Yard 3m Perform Masking Tape Overview
Scotch« Specialty Painter's Masking Tapes Masking Tape Type: Tape Masking Tape Style: Heat & Solvent Resistant Masking Tape Color: Tan Width: 1/2, 12 mm Length (Yards): 60 Length Meter: 55 Tensile Strength: 26
3M 00021200445576 1/2" X 60 Yard 3m Perform Masking Tape Specifications
Available at Amazon Check Price Now!
*** Product Information and Prices Stored: Mar 12, 2010 05:50:06
3M 00021200555633 2525 48mmx55m Orange Flatback Tape
3M 00021200555633 2525 48mmx55m Orange Flatback Tape Review
3M 00021200555633 2525 48mmx55m Orange Flatback Tape Feature
- Package Quantity: (1) 55 Meter Roll
- Masking Tape Type: Paper
- Masking Tape Style: Performance Flatback Tape
- Color: Orange
- Width (Inch): 2
- Width (mm): 48mm
- Length (Yards) (Yards): 60
- Length Meter: 55
- Tensile Strength (Pounds): 49
- Thickness (mil): 9.5
3M 00021200555633 2525 48mmx55m Orange Flatback Tape Overview
Flatback Masking Tapes Masking Tape Type: Paper Masking Tape Style: Performance Flatback Tape Color: Orange Width: 2, 48 mm Length (Yards): 60 Length Meter: 55 Tensile Strength: 49
3M 00021200555633 2525 48mmx55m Orange Flatback Tape Specifications
Available at Amazon Check Price Now!
*** Product Information and Prices Stored: Mar 11, 2010 03:50:06
Bainbridge Mat Board Makes A Great Gift
When photographic images are raised to the level of art, there is nothing better for framing than wood picture frames. Like wood floors and furniture, wood picture frames have a warmth, a luster and a connection to simpler times that sterile metal frames cannot match.
Get Started Right
Photography itself may be art, but framing such art properly is a science. Even with the best photo framing supplies, if this isn't done correctly, the best photographic print will look cheap and tawdry - and may even suffer an early demise from acids, humidity, or ultraviolet light.
In addition to a good selection of custom wood picture frames in the appropriate sizes, here's a list of what you'll need:
- mount board
- backing material for the print
- "hinge tissue" or other adhesive, and/or "photo corners"
- photo mat board (bainbridge mat board is preferable)
- glazing
Bainbridge mat board is of the highest quality, acid-free materials. This is important, because acids from low-quality photo mat board will eventually result in "mat burn," which produces unsightly stains on the image. In addition, high quality photo mat board is treated with an alkaline buffering agent in order to raise the pH level and present such damage from occurring.
You'll also need enough mat board to make both a back mat and a window mat, for reasons that are described next.
Putting It Together
The purpose of the mount board or backing board is to hold the photograph rigid in the frame and prevent it from warping, or "bowing." There are several kinds available, but whatever kind is chosen, you'll need some kind of barrier between this mount board and the photo mat board. This is especially important when using wood picture frames, which are organic and porous; the idea is to minimize the possibility of the effects of humidity and environmental contaminants that could destroy the print.
Paper hinges are preferable to other adhesives for affixing the print to the mat board itself. These are similar to "double stick" tape that is specially formulated for use with photographic paper. Alternatively, you may wish to use "photo corners," which will not require that any adhesive be applied to the photo itself.
The "window mat" is placed atop the print itself to prevent direct contact between the glazing material (glass or acrylic - plastic should be avoided) and the surface of the photograph, which otherwise could become stuck to the image.
The Finished Product...
Artistic photographs deserve the best photography frames you can afford, and fine wood picture frames are the most attractive in virtually any setting. However, keep the appearance of the display area in mind when selecting frames; if the rooms accents are primarily of one kind of wood stained and finished in a particular color, you'll want to make sure that your wood picture frames complement, and not detract from the décor.
Susan Slobac is an avid photographer. Susan believes a picture frame is more than just fashion; it's a safeguard for something you love.
7 Secrets of Collage Scrapbooking
Make your ordinary scrapbooking to extraordinary collage scrapbooking. I love to create a collage while doing my painting or drawing. A collage can be done by using vintage set, cigar box, cloth, puzzle, rubber stamp etc. Here I share some of my tips on how to make your ordinary scrapbooking into an extraordinary collage scrapbook.
Secret #1 Collection of rubber stamps.
When you purchase rubber stamps, look for rubber stamps manufacturer to custom make your family photo rubber stamp. You can create collage that is family topic related using your custom make stamps.
Secret #2 Collection of music note or song lyrics.
I noticed a lot of songs lyrics are with nice poem, and lovely sentences. All this lyrics are very suitable for collage scrapbook. It helps to create the artistic atmosphere, with added one or two lines of musical note or lyrics.
Secret #3 Acrylic paint to add glaze to your scrapbooking.
Buy some acrylic paint in metallic, earth tone or bronze color to paint in your scrapbooking background. This is actually creating historical look for your scrapbook that worth value as collection.
Secret #4 Image transfer technique to create unique design of your collage scrapbooking.
There are many ways to do image transfer. One of the easiest cheapest way is using packing tape to do a packing tape transfer. It is done by cutting your image out and paste it to packing tape, then soup in warm water for five minutes, then put the no sticky side on table with the sticky side up, rub the no sticky side paper with your finger, until you can see your image on the packing tape.Remove the access of packing tape, and using glue or double side tape to paste your image on your collage scrapbook. Another image transfer technique is heat transfer using a heat transfer tool. You can invest this method which is more straight forward and cost effective in long term.
Secret #5 Collection of beads and buttons or leftovers from other projects.
I would like to call this "Rojack Art". "Rojak" is Malay term, meaning local salad of Traditional Malay in Malaysia and Singapore. It is make of mixture of fried bean curd, fried snack, pineapple, cucumber with local made prawn gravy. If you are chilies lover, it will taste most yummy with some chilies added. Back to my topic, "Rojak Art" is something like using some leftovers from other projects, with beads and buttons, spread it on your scrapbook paper corners. First spread some adhesive on your scrapbook paper, then spread the big items, such as buttons or seashell. Then, add some adhesive, spread small item to fill up the gaps between the big items. Finally put your photo and you are done!
Secret #6 Stamps collage scrapbooking.
My husband's hobby is collecting stamps. He collected many duplicate copy of same stamps. I borrowed some from him for my collage design. You can do this by purchasing a simple design wooden frame, then using adhesive to paste your stamps around the photo frame. Last add some light brown or metallic bronze color acrylic to make historical look.
Secret #7 Make aging technique with coffee and tea staining.
This is nothing new methods. Lots of people are using this technique to create aging look of photos in your scrapbooking. I like to use tea to create aging or historical look in my photo. This is done by putting your photo in the tea, place it for long period, depending on the tone hue you want. Then air dry your photo before you use it in your collage scrapbook.
Hope you enjoy the above secret method of collage scrapbooking!
And now I would like to offer you free access to 3 of my Instant Scrapbooking Guide Templates when you subscribe to my free Instant Scrapbooking Guide, full range of long term newsletter plus free printable design on Scrapbooking. You can get your instant access at http://www.InstantScrapbookingGuide.com From Jasmine N's Circle of Scrapbooking Craz.
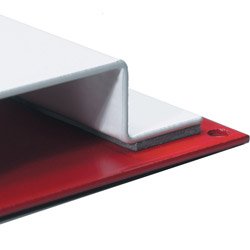
3M(TM) VHB(TM) Acrylic Foam Tape 4941 Gray, 1/2 in x 36 yd 45.0 mil [PRICE is per ROLL]
3M(TM) VHB(TM) Acrylic Foam Tape 4941 Gray, 1/2 in x 36 yd 45.0 mil [PRICE is per ROLL] Review
3M(TM) VHB(TM) Acrylic Foam Tape 4941 Gray, 1/2 in x 36 yd 45.0 mil [PRICE is per ROLL] Feature
- Color: Gray
- Width: 1/2 IN
- Length: 36 YD
- Model: 4941
- Sale Unit: ROLL
3M(TM) VHB(TM) Acrylic Foam Tape 4941 Gray, 1/2 in x 36 yd 45.0 mil [PRICE is per ROLL] Overview
Application ideas include bonding muntin bars to windows, bond and seal polycarbonate lens over LCD, bond prepainted metals in truck assembly, bond and seal prepainted control panels/switch gears, and mount vinyl wiring ducts and conduit channels.
3M(TM) VHB(TM) Acrylic Foam Tape 4941 Gray, 1/2 in x 36 yd 45.0 mil [PRICE is per ROLL] Specifications
Available at Amazon Check Price Now!
*** Product Information and Prices Stored: Mar 07, 2010 18:45:04
Printed Tape For Packaging And Brand Building
The printed tape that is used to seal your packages does multiple duties. Above all, it securely seals your package or parcel during transit. The tape can also highlight handling instructions as when the printing consists of clearly visible words like FRAGILE or GLASS.
However, the most profitable use of printed tape is in using it to build your company brand. Print your packaging tapes with your Logo, Company Name, Contact Phone and even a short, high impact, Promotional Message. Not only your customers, but also the package handlers and persons passing by the stored packages will then come to see your message. It will be a waste not to use the package real estate by using printed tapes.
Printed Packaging Tapes
The tapes can be made of different materials like Vinyl or Polypropylene. Each material will have differing characteristics. Vinyl is excellent for making printed tape as it has good printability property.
The copy to be printed on the tape consists typically of your company logo, name and contact details. The design of the copy should be high impact to create the kind of impression you want to make. If necessary, you can seek the help of your printed tape supplier to create an easily recognizable and impressive design.
You can ask the tape supplier to show you the proof before the final printing begins. With modern computer aided design methodologies, the design can be developed quickly and you can expect a proof within, say, 24 hours.
Once you approve the proof, the printed tapes can usually be delivered in one or two weeks, depending on the workload of the tape manufacturer. Even if the delivery period is slightly longer, it is better to entrust the work to quality conscious suppliers. They can ensure quality printing that will be impressive and will not fade by the time the package reaches its destination.
The type and color of material used can affect the overall impression created. The printed tape can be made of clear, adhesive plastic, or can be colored, say, white, yellow or buff. The printing should be highly visible and readable against the background.
Incidentals of Ordering Printed Tapes
What kind of material should be used for making the printed tapes? Do your products need self adhesive, clear plastic tapes? Or do you need printed strapping tapes?
Tapes can come in different widths and lengths. What widths are suitable for your standard and non-standard packages? What lengths are convenient for your shipping department to avoid frequent reordering? How many rolls does the tape supplier supply in a carton?
You should also look at the design services, printing quality and delivery periods offered by the printed tape supplier, in addition to the prices. In these days of online e-commerce, you should find it easy to obtain your requirements direct from manufacturers, at the best prices.
Conclusion
Printed tapes can be used not only for securely sealing your packages but also for your brand building campaign. The tapes come made of different materials, in different colors, widths and lengths. Select the particular configuration that suits your needs and print the tapes with your logo, company name, etc. Ensure that your tape supplier uses high quality printing.
Your packages will then be messengers of your company all along their journey.
About Auther:
Anthony Abram writes about Printed Tapes please visit our website for further details.
UGlu MTR703 Multi-purpose Industrial Strength Adhesive Strip Variety Pack
UGlu MTR703 Multi-purpose Industrial Strength Adhesive Strip Variety Pack Review

This is hands down one of the best adhesive products I've ever used. I know I'm reiterating things other reviewers have said, but it bears repeating...
1) Easy to apply. Get some sharp scissors, cut off a piece, slap it on and press. Instant bond, no mess.
2) Tough, flexible bonding. This is truly the "bamboo tree" of adhesives. While superglue bonds can give and leave you with messy, spackled edges, this adhesive will bend and stretch under pressure. Pressing your project back into proper form takes minimal effort and it will keep holding.
3) If you have to re-apply the glue or remove it, it is very easy to remove. They say "use soap and water". You don't have to. Here's a trick for ya. Color over the exposed adhesive with a permanent marker, wait five minutes, and then scrape it off using a fingernail or a penny. Wad it up and toss it in the trash. Done.
Lastly, you get a ton of it for your money. I don't think I'll be able to use it all up for years. Highly recommended.
UGlu MTR703 Multi-purpose Industrial Strength Adhesive Strip Variety Pack Feature
- Strength of adhesives with the convenience of tape
- Waterproof and weatherproof
- Bonds to almost any material
- Bonds on rough or uneven surfaces
- Non Toxic acid free
UGlu MTR703 Multi-purpose Industrial Strength Adhesive Strip Variety Pack Overview
UGlu adhesive is an amazing way to bond many different surfaces together. UGlu combines the strength of adhesive with the convenience and ease of tape. You will even be able to bond surfaces that are rough and uneven instantly! Unlike glue you won't have to wait or deal with the mess, drips, cleanup or hassle! UGlu will hold up to 2 lbs and can be cut to the custom size you need! It provides an instant bond that is faster than super glue, but has no cure time and can be cleanly removed. UGlu is non-toxic and acid free, and made in the USA!
UGlu MTR703 Multi-purpose Industrial Strength Adhesive Strip Variety Pack Specifications
Available at Amazon Check Price Now!
*** Product Information and Prices Stored: Mar 05, 2010 16:05:06
Quickly Get Rid Of Warts Starting Today
So you have decided you want to remove your ugly warts. Not only are they ugly they can sometimes be irritating. These irritating bumps on your skin are caused by the human pappilloma virus abbreviated as HPV. Due to the fact that warts are viral in nature makes them contagious.
When deciding to get rid of these warts there are a few things you need to take into consideration. Do not just go cutting them off yourself. This could cause an infection. If you are diabetic you should consult a doctor before you do anything.
In the case of dealing with common warts you will see at the top of the bump there can be a break in the skin. In actual fact you may be able to see little dots which are the blood vessels that keep the little blither alive.
Do not pick at this. Because they are contagious you could spread the virus to other places on your body and you may spread it to others also. If you ever have to touch it wash your hands in warm water immediately.
One of the most common ways to get rid of warts uses the simple technique of adhesive tape. There are different schools of thought about how long you should leave it on for. Some people say a few days - others say one day - then replace it.
The tape just basically rips the wart off layer by layer. Do what is most effective for you. You could leave it on for a couple of days then remove it and see what is left and adjust the procedure from there.
In the event you have common warts on your hands you can also use the simple technique of boiling water and placing your hands in it to help get rid of the wart. Warts do not like hot water. Just always remember to dry off thoroughly as they do like moisture.
If you have tried all of the above and failed and would like a step by step method to quickly get rid of your warts then select any of the links provided. There is a method that as worked for a lot of people. They guarantee that it will work for you - if not you get your money back. You owe it to yourself to try it out.
Do you want step by step guidance to prevent Moles, warts and skin tags?
Learn How to get rid of skin tags.
The Easy Steps to Set Up a Tattoo Gun
Every profession has tools of the trade, and the tattoo industry is no exception. All the ink, flash, stencils and needles in the world would be worthless without the tattoo gun. Your tattooist will definitely know what you're talking about when you used the word "gun", but it's a generally thought of as an amateur term. Professionals usually just say "machine" or use the term "iron".
The first tattoo machines where based on something Thomas Edison (that's right, that Thomas Edison) invented in the year 1876 called the Autograph Engraver. The device was originally meant to be an engraving machine. The design was improved upon some years later by a man named Samuel O'Rielly who came up with and needle and rod system and ink reservoir. The modern day machine has evolved quite a lot since O'Rielly's version. The first apparatus resembling the current model was so heavy; it was often mounted to the ceiling with a spring so that the majority of the weight was taken off the tattooist's hand.
The version used today allows for much more precision in depth, saturation, everything. In fact, the art of tattoo application has become so precise that dermapigmentation, or applying permanent cosmetics to the delicate skin of the face and eyelids is possible and popular. The gun works on an alternating current system, similar to a sewing machine. The needle moves between 80 and 150 times per second, speeding up the process, cutting down on skin irritation and allowing the artist to work without moving very much so that his hand remains as steady as possible.
The needles are soldered into tubes in all different numbers and arrangements. The purpose in having a variety of configurations is the same as a more conventional artist having more than one paint brush. Each one produces a different effect. Some are for outlining, some are for shading to varying degrees and some create a solid fill. The general mechanics of a tattoo gun are fairly simply. In fact, some inventive person could put one together at home with parts of things you probably have lying around the house. There are several very good reasons you should never, ever do this, injury and disease to name just two, but since when has that stopped everybody?
* An ink pen
* Guitar string
* A tooth brush, or something similar (you'll see in a minute)
* The eraser from the top of a #2 pencil
* A small, battery operated motor, like what would be in a hand held cassette player
* Tape, or some sort of adhesive to hold it all together
* Some sewing needles
First you take four or five inches of guitar string and bend a little bit toward the end. Next, you remove the tube of ink from the pen. Cut it down to three or four inches long, then remove the brass ball at the end, making sure the opening created is large enough for a needle to pass through. Insert the needle into the tube. Then decapitate the toothbrush. Use a lighter, or some other flame to heat the plastic just until it's soft enough to bend, and then do so in an L shape.
Then, use your adhesive of choice to join the tube/needle combo to the long end of the L. Gently push the eraser onto the motor's shaft, getting it as centered as possible, then attach the motor to the short end of the L. Stick the bent end of the guitar string should be pushed (off center) into the eraser, and the other end should go through the tube and attached to the needle. The thinner the tube, the more control you will have over the gun. Now that you know how to manufacture a tattoo machine, DON'T!
Find out how to set up a tattoo gun at http://www.tattoodles.info/tattoo-artist-tips/how-to-set-up-a-tattoo-gun
The Tummy Tuck Procedure - Flatter Your Stomach
People with problems of sagging abdominal areas usually consider the tummy tuck or abdominoplasty procedure. This process is an effective way to tighten your stomach and muscle areas for firmer and flatter abs. It also takes out the excess or wrinkled skin and fats as well. Stretch marks obtained after pregnancy by some women can be eliminated by going through this tummy tuck procedure.
The tummy tuck procedure is best for abdominal wall deformities obtained after pregnancy or as a result of ageing and marked weight loss. This procedure also takes out the fat tissues, which are most commonly located in the lower abdomen and has been the number one problem of all women of various age groups. Though liposuction helps, the remaining loose skin must be given special attention and proper treatment to obtain the desired shape of the body.
The first step in the tummy tuck procedure is the administration of the anesthesia. This process is being done by an anesthesiologist to provide the patient comfort during the whole session. The choices for this first step include intravenous sedation or general anesthesia.
Next is the incision. The full tummy tuck procedure is made with a horizontal incision that starts from the navel down to the pubic area. This incision style actually weakens the muscles of the abdomen which will then be ready for repairs and sutures, all the while removing the excess fat, tissue and layers of skin.
Third step of the tummy tuck procedure are the sutures, skin adhesives, tapes or clips to close the incisions of the skin.
And for the last step, is the recovery and waiting period. This step is the most exciting since the end result may not be visible immediately after the tummy tuck procedure. Swelling and redness along your midsection is quite normal and it will gradually return to its normal state in a matter of weeks.
The tummy tuck procedure will make your abdomen flatter with firmer muscles in the midsection areas, thus giving you more confidence of your body.
For more information about Tummy Tuck Procedure, feel free to visit us at: http://www.about-tummy-tucks.com/article-9-Tummy-Tuck-Procedure.html
The Benefits of Cheap Wireless Home Security
The main component of cheap wireless home security is the wireless security camera. When you hear people talking about going wireless with their home security, they usually mean that have replaced their old security cameras with modern wireless ones.
Going wireless means that you don't have to mess around with all the wires that come with surveillance equipment. This is especially helpful when using security cameras because installing them will become easier without all the wires.
Wires will also sometimes blow the cover of your security camera, thus intruders will be able to point blind spots that your camera does not cover.
Benefits of Cheap Wireless Home Security:
1. Homeowner will be able to monitor activities within and outside of their home.
- Keep watch on your kids wherever they are in the house.
- Prevent intruders from entering your home or use the footage to identify the intruder
2. Setting up the surveillance will not require the homeowner to hire a professional to work out all the wire. They can install the equipment themselves. Some pieces of equipment do not even require to be screwed into the wall, most of them come with their own strong adhesive tape.
3. Cheap does not mean bad quality, there a lot of affordable home security systems in the market today.
4. Buying cheap means the homeowner can purchase more surveillance equipment for their home. With more equipment, the homeowner will be assured that all spots in their residence are covered.
5. Home security is different from home surveillance. Home security will do more than tell you what is happening in your home. There are some systems that are programmed to contact the right authorities should trouble arrive in your home.
6. As a follow-up to benefit #5, the cheap wireless home security system will provide the homeowner with complete piece of mind. They will be able to sleep soundly at night knowing that there is a blanket of protection over their home.
Discover more about wireless home security. Get free tips and advise on cheap wireless home security.