Dog Emergencies - Make Your Own Dog First Aid Kit
Knowing dog first aid skills are very important, just as with humans and knowing what to do in the event of an emergency may mean the difference between life and death for your dog. Dog emergencies or any other extreme medical situations require that you get your dog to the veterinarian as quickly as possible.
Of course, not every possible ailment will need professional treatment but better safe than sorry. If your dog ever receives any kind of injury it is always best that you be aware of what to do in advance (depending on what type of injury the dog has received). Different kinds of injuries require different kinds of treatments. Many kinds of injuries may require immediate medical assistance. It is a very good idea to know how to prevent any dog emergencies, treat various minor injuries with first aid and just when you need to seek immediate veterinary assistance and care.
In case an emergency ever were to happen it is easy to prepare for it in advance by creating your own dog first aid kit. It is very easy to create. Good ideas for containers could be a lunch box, a tackle box or some other shoe box sized plastic container. Water-proof and strong enough to withstand mild pressure is the best idea.
It would be a great idea to label the first aid kit on all sides with something such as "Dog First Aid Kit". It's also a very good idea to list a description of your dog(s) including it's name, color, weight, any health issues, distinguishing characteristics with a recent photo labeled with the name of every pet that you own.
An index card with the numbers of your local veterinarian, poison control, and other canine emergency numbers for your dog (emergency vet, etc) is also a good thing to include in the dog first aid kit. Here is a list of several items you should put in your dog first aid kit with brief explanations as to what each item is for. Remember, your dog's health may depend on it.
Dog First Aid Kit Basic Ingredients List:
Activated charcoal: for poisonings (1 gram per pound, mixed with water),
Antihistamine tablets: for insect stings and allergic reactions,
Betadine or Nolvasan: cleaning open wounds,
Blankets: several if possible, to help prevent against shock in the event of an accident or injury as well as a good way to transport an injured dog,
Blunt nosed scissors: to cut tape and clip. Keep these scissors with the kit.
Canine rectal thermometer: to take the dog or puppies temperature,
Cortisone ointment: Used as a topical anti-inflammatory,
Cotton balls and swabs: Used mainly to clean wounds,
Eyedropper or dosage syringe: to apply medications to your dog,
Eyewash: to irrigate the eyes of your dog,
First-aid cream: to sooth and protect wounds,
Gauze bandage: for wrapping wounds,
Gloves: both thin plastic to avoid contamination and thicker ones if you have a fear of being bitten,
Hand towels: to dry hands, for clean up, etc.,
Hydrogen peroxide (3%): has various uses, one of which is to induce vomiting,
Kaolin and pectin: to help diarrhea (1 teaspoon per 10 pounds),
Magnifying glass: to help locate any tiny objects
Muzzle: even the best dog may bite when in extreme pain. If you don't have one you can also make one from strips of soft long fabric, tube socks, etc.,
Nail clippers: best case scenario, have both human and canine nail clippers,
Non-stick adhesive tape: to help tape bandages in place,
Non-stinging antiseptic spray: to help clean wounds,
Pepto-Bismol , Maalox or Kaopectate: to help relieve minor stomach upsets,
Petroleum jelly: for use with the rectal thermometer, also an aid in constipation (1/2 teaspoon per 10 pounds),
Saline solution: can be used for many things such as irrigating wounds,
Stretch bandages: for wound dressing,
Styptic pencil: to stop minor bleeding,
Syrup of Ipecac: used to induce vomiting (1 teaspoon per 20 pounds),
Tweezers or hemostat: use to pull our splinters or other small foreign objects,
Vegetable oil: for mild constipation (1 teaspoon per 5 pounds, mix it in with food)
If you can think of other items to add to your dog first aid kit, feel free to do so. This list is just a place to get you started in creating your own dog first aid kit.
Any of the following symptoms or injuries require IMMEDIATE medical action from your veterinarian. Contact your vet immediately if your dog or puppy has any of the following:
Been hit by a vehicle,
No pulse or heart beat,
Broken bones,
Puncture wounds to the abdomen or chest,
Spurting blood,
Bleeding from nose or mouth,
Bloated abdomen,
Repeated vomiting,
Pale gums,
Diarrhea for more than 18 hours,
Muscle tremors,
Problems with breathing or swallowing,
Refusal to eat for 48 hours,
Seizures or disorientation,
Unusual swellings (especially ones that are sudden, hard or fast growing)
In any emergency situation try and keep as calm as possible and to get your dog to the veterinarian as quickly as possible. If anything ever happens, call first to see if the office is open, and to let the vet know what has happened and that you and your dog are on your way.
If your veterinarians office is not open for whatever the reason, call your nearest emergency vet clinic. Always keep all emergency phone numbers, including those of your veterinarian and emergency veterinarian clinic, near your telephone.
Debbie Ray, owner of http://www.pedigreedpups.com , http://www.cheap-legal-help.com and http://www.total-german-shepherd.com is a lifelong dog owner, teacher and internet business owner. Want to learn more about internet business? Purebred dogs? Let me teach you.
Copyright 2007 . Debbie Ray . All Rights Reserved
3M 00021200393839 396 6"x36yd Trnsprnt Super Bond Film Tape
3M 00021200393839 396 6"x36yd Trnsprnt Super Bond Film Tape Review
3M 00021200393839 396 6"x36yd Trnsprnt Super Bond Film Tape Feature
- Package Quantity: (1) 36 Yard Roll
- Type: Film Tape
- Width (Inch): 6
- Color: Transparent
- Length (Yards) (Yards): 36
- Thickness (mil): 4.1
- Tape Number: 396
3M 00021200393839 396 6"x36yd Trnsprnt Super Bond Film Tape Overview
Specialty - Industrial Tape Type: Film Tape Width: 6 Color: Transparent Length (Yards): 36
3M 00021200393839 396 6"x36yd Trnsprnt Super Bond Film Tape Specifications
Available at Amazon Check Price Now!
*** Product Information and Prices Stored: Feb 26, 2010 23:15:03
Color - Grey, Thickness - .02, Size - 4" x 60' Roll, General Purpose, Anti-Slip Tape (1 Roll)
Color - Grey, Thickness - .02, Size - 4" x 60' Roll, General Purpose, Anti-Slip Tape (1 Roll) Review

Color - Grey, Thickness - .02, Size - 4" x 60' Roll, General Purpose, Anti-Slip Tape (1 Roll) Feature
Color - Grey, Thickness - .02, Size - 4" x 60' Roll, General Purpose, Anti-Slip Tape (1 Roll) Overview
Laminated vinyl film with pressure sensitive adhesive back. Good tear strength. Light soft feel. Comfortable on bare feet and hands. Simply position, peel off backing paper, and apply to a clean, dry, oil free surface. 35000 series is surface compatible with painted wood, metal or sealed concrete. 41000 series is surface compatible with painted metal, sealed concrete, porcelain and fiberglass. Improves traction in both wet and dry applications. All rolls are 60 feet long and can be cut with scissors.
Color - Grey, Thickness - .02, Size - 4" x 60' Roll, General Purpose, Anti-Slip Tape (1 Roll) Specifications
Available at Amazon Check Price Now!
*** Product Information and Prices Stored: Feb 25, 2010 14:20:03
How To Install Hardwood Floors
A hardwood floor undoubtedly adds charm, character and value to a home. Beautiful and hard-wearing, they almost never need to be replaced. With a huge variety of woods, finishes and designs, hardwood floors offer an endless choice of possibilities to suit any type of home.
Sub floor preparation
o All sub floors must be clean, level, absolutely flat and dry. Scrape and smooth any debris off the surface, sand high areas or joints and fill low areas and cracks with the proper compounds.
o Prepare all doorways and walls - undercut all door casings and remove all moldings.
o Concrete sub-floors must be completely cured and dried (8-12 weeks old) with minimum surface temperature of 60ºF (15ºC) and maximum moisture content of 2% dry-weight basis. The ideal relative humidity in the room should be 55%.
o Wood sub floors need to be well secured with counter sunk screws on ring shank nails. It should not exceed 14% moisture prior to installation.
Floating Installation
Spread and unroll the required polyethylene cushioning underlayment parallel to the longest wall (they can be trimmed after the installation has been completed). Allow sufficient overlap on all joints with the next sheets; use double adhesive tape to fix the joints. Complete until the whole surface is covered with the underlayment. Pick the first floorboard and align it with the closest wall, groove side facing the wall. The installation should begin from the right corner of the room.
Use ½" (12mm) temporary spacing-wedges to create the necessary gaps from the walls. Pick the second board, apply 1/8" (3mm) glue bead at the inner topside of the groove at the board end, and start jointing the board in the row. Never apply glue onto the tongue. Continue the same steps until the first row is competed.
Use a specially designed crowbar to push all the joints tight at the same time. Use this crowbar to tighten joints from the sides and use clamps whenever necessary to ensure tight and square joints. Never fail to wipe off any excess glue immediately. Repeat all processes and install the rest of the floor.
Allow the finished floor to be free from load and traffic for at least 8 hours before all temporary spacing wedges are removed. Install all the skirtings/moldings the next day, making sure that they are fixed onto the adjacent wall only, and not directly fixed onto the floor.
Nail Down Installation
This method of flooring installation gives some advantages over other methods such as speed, reduced labor materials and more immediate "use" of the floor. However, the process is more difficult and some professional assistance may be required.
Lay the first floorboard as for floating floorboards. Once the floorboard is aligned perfectly, face nail the board with the nail perpendicular to the surface. Use 1 - 1.5" finishing nails depending on the thickness of the floorboards installed. Continue the same step until the first row is completed.
Start the second row in the same manner. From the second row on, nailing is done on the tongue side only. Continue to install all the remaining rows.
The final row of flooring is usually narrow and it will likely be necessary to rip floorboards lengthwise to fill in the row. Measure the remaining space and cut the boards accordingly, ensuring a ½" (12mm) gap at all sides. Nail down this last row in the same manner as the nailing of the first row, and complete the installation. Once the nail down work is completed, install all the skirting and moldings. Make sure that all skirtings/moldings are fixed onto the adjacent wall only, NOT directly to the floor.
Glue Down Installation
This method of installation requires fans to create airflow and to help speed up the drying time of the adhesives. This type of installation does not need any cushioning underlayment.
Determine the working area to begin the installation in and the longest wall in the room with access. Make a test and dry lay floorboards beforehand, if necessary. A starting block is recommended to help the initial floorboard placement. Nail the starting block down firmly along the starting line, within the working area, to help hold the first row of the installed floorboards firmly in place.
The adhesive should be used sparingly over an area that can be laid with flooring within 3 hours. Pick the first floorboard and align it with the starting line (starting block) along the groove's edge. The installation should ideally start from the right side. Lay the first floorboard and ensure that there is a 12mm (1/2") gap from the adjacent wall.
Pick the second board, apply 1/8" (3mm) glue bead on the inner topside of the groove at the board end and start jointing the board in the row. Never apply glue on the tongue. Continue the same steps with the next floorboard and complete the first row. Use a specially designed crow bar to pull the last board into place. Push joints tight and drive spacing wedges in. Clean any excess glue from the joints immediately.
Continue laying each row as described above. Note that unlike the floating installation method, longitudinal tongue and groove gluing (along the edge of each row) is not compulsory with this glue down method.
To prevent movement, tape flooring down every 3 completed rows across the face together using temporary-adhesive masking tape.
Every 2-3 hours and upon completion, roll the floorboard surface with a 100-150 lb (50-70 kg) roller to ensure all boards are flat and in perfect contact with the adhesive. Wrap the roller with cloth or foam pad to avoid scratches or dents on the floor surface.
Allow the finished floor to be free from load and heavy foot traffic for at least 24 hours after completion. The next day, remove all temporary spacing wedges and install all of the skirting/moldings, making sure that they are fixed onto the adjacent wall only, not the floor.
http://tamalpaishardwoodfloors.com
http://home.howstuffworks.com/hardwood-floor.htm
To Spray Or Not to Spray?
A paint sprayer is a wonderful thing when used properly. If you have a large painting project looming, and are not afraid to get a bit messy, this might be for you. Anyone can rent a paint sprayer from most local hardware or paint stores and with some instruction, get good results. Here are a few pointers for the serious do-it-yourselfer.
To start with, a sprayer can be very dangerous, in fact deadly if used improperly. When the spray comes out of the tip, it is usually under high pressure which will cut like a razor or produce a very nasty injection wound. When the paint or stain is injected into your bloodstream, it can be deadly if it reaches a critical organ like the heart, brain, etc.
Never set up or clean out the machine with a spray tip on the gun. First, remove the tip housing and lower the pressure to a minimum. Second, if your paint hose develops a leak, no matter how small, do not touch the hose or try to stop the pinhole leak with your hands. Go to the machine and open the bleeder valve to release pressure from the system, and then shut it down. If you try to stop this tiny stream of paint it will surely puncture your skin and cause the injection wound I just mentioned.
Once, on a job where I was spraying, a pinhole developed in the hose and while I did tell the helper not to touch anything, he did. He thought that he would be able to stop the stream with his thumb bad move. The thin stream of oil based paint injected his skin and went clear through his thumb, streaming out through the other side! We rushed him to the hospital and he laid there for over two weeks with his thumb laid wide open like a hot dog cut in half lengthwise. The nurses came in twice a day to literally scrub the raw meat so as to stop the flow of chemicals to his vital organs. Do I need to say more? Spend a little time with the rental person and make sure you know how to properly operate the sprayer before you take it home.
For the most part, there isnt much that you cant use a sprayer for. The main idea is to reduce the labor time for any given project. Sometimes it can be quicker to use conventional brush and roll methods rather than take the time needed to properly mask areas not to be painted. Youll have to survey the situation and make that determination. If spraying, you will need to gather a few items before beginning. You will need to cover anything that you dont want painted or over sprayed. Wear clothing that you can get paint on, and perhaps a spray hood from the paint store to cover your head. You will also want to purchase a respirator so that you dont breathe in any paint. Get some good drop cloths, rags, staples and staple gun, two inch tape, and perhaps some plastic to start.
Wrapping, as it is frequently called, in and of itself is quite a task on larger projects and is a bit of an art form for professional painters. You may need other more specialized sundries as well, but these will get you going. If you run into an unusual situation where these arent sufficient, go to your local paint store and explain your dilemma, they can help. When wrapping any item, keep in mind that the sprayed paint is under pressure, so keep you coverings tight so that the paint spray doesnt loosen your covering job. Staple plastic and drop cloths to wooden surfaces when possible, and then tape over the stapled edge to create a straight line. If you cant use staples at all, consider pre-taped plastic on a roll. This is available at the paint store and is handy for windows, cabinets, tubs and the like. In any event, make sure that your wrapping is not loose as the spray will cause it to flop wildly and eventually come off.
It is also helpful to note that when using tapes, there are a wide variety of sizes and styles. The white tapes are cheapest and have the strongest adhesives. When taping outside or in direct sunlight, you may consider using a blue or green tape. While these tapes can cost up to seven dollars per roll, they are designed to come off easily for up to a week in direct sunlight, which can be a huge problem if ignored. The sun seems to bake the adhesive onto the surface it protects, making removal very aggravating and slow. Once you have all of the necessary areas covered, its time to set up the machine and begin painting!
There are a couple things to remember before you begin. First, always use the lowest pressure possible to accomplish your task. Once the machine is set up and primed, begin in an inconspicuous spot, with very low pressure and raise the pressure slowly until the spray pattern is full and even, without lines. You should keep your spray gun about twelve to fourteen inches away from the surface and move with it so that distance and a 90 degree angle to the surface are maintained. You will need to overlap your spray pattern depending on the surface and its texture.
On exterior wood, you should always backbrush the paint into the wood for the first coat, which means that the spray pattern is not very important. You should apply plenty of paint, even to the point of it running. But on subsequent coats that wont be back brushed or rolled, your spray pattern and the amount of paint applied will be crucial. All I can say is to practice, and be prepared for mistakes.
If spraying inside, it is always a good idea to backroll the final coat of paint so that you can touch up the paint over time with the same size roller nap. Use a roller on a pole with a 3/8 inch nap for smooth walls or a 3/4 inch nap for textures. Roll from floor to ceiling in long strokes. If you dont do this, the sprayed finish will be shinier than any subsequent attempts to touch up with a roller, since the roller nap will leave a slight texture. Back rolling is best accomplished with the help of another, so that you can continue to spray and backroll simultaneously. Again, each job is different, so you may want to ask your paint supplier for more detailed instructions to fit your specific needs.
Whether or not you will be attempting this yourself, let me dispel the myth that I frequently hear in dealings with my clients. The truth is, it is ok to use a sprayer to apply paint to cedar shakes and other wooden surfaces. In fact, if a painter tells you otherwise, he probably doesnt have any experience with using a sprayer. You might be surprised how many contractors dont have that experience. The problem occurs when the sprayer is used improperly. As I mentioned earlier, when painting wooden surfaces or any other porous surface for that matter, the first or prime coat must be worked into the tiny cracks and crevices with a brush or roller. When back brushing is omitted, the paint will not penetrate as it should. As the underlying surface expands and contracts with the seasons and moisture, the paint will begin to lose adhesion, causing peeling of the paint. If this all seems a bit much for you to handle, dont worry, you are not alone. As I mentioned before, not even all painters can spray properly. If you do think that you might try this, just remember to take notes while getting your info on how to set up and use the machine. If you make a mistake, you can always paint over it, or clean up the mess. Spraying is absolutely high on the difficulty scale for do-it-yourself projects, so consider all of the suggestions above before starting, to determine if this is really for you to attempt, or if you would be better off hiring a professional.
To see more articles like this...
http://www.beachpainting.com/articles.html
http://www.beachpainting.com
Why Framing Your Art Is Important
Many people believe that when they choose a frame for an art print, they should pick one that is aesthetically pleasing to the eye. While aesthetics is important, many overlook the true reason for framing an art piece – protection. A well chosen frame will not only enhance the art work and make it look good; it will also protect the material and increase its lifespan for the years to come.
A beautiful art piece, when left unprotected, can sustain unsightly damage over time, and become an eyesore in your home.
Here are some of the more common damages to your art print:
A decorative art print, when simply stuck on the wall without any form of framing, could start to show damage in as little as a few weeks. The material could tear along the corners or edges. This is because the print has been in a rolled up state for most of its life - when it was in the merchant store before you bought it. When you try to spread the print open to stick on the wall, the paper is still trying to roll into itself. The adhesive tape that you’ll probably use will not be strong enough to prevent the print from creasing in on itself, thus causing the tears.
The other concern you should be worried about is fading or discoloring. If an unprotected art print is exposed to the elements like direct sunlight, the ultraviolet effects could cause the paper to discolor and become brittle, thus tearing easily. Over time, dust and moisture in the air will also cause a great deal of damage to the print.
Here are some things you should do to prevent damage to your art print.
Choose a professional framing service to frame your art print. Note that some framing materials contain acids that may cause damage to the art piece, so make sure the frame shop provides acid free backings, mats and mounting materials so that damage to your art print is avoided. Choose a UV filtering glass to give the art work extra protection from ultraviolet light. Make sure to use proper hanging materials to mount your art on the wall. Never display your art piece in direct sunlight or near a heat source. UV light, as mentioned, will certainly cause fading and discoloring of your art print.
Maintain your art piece regularly by cleaning it with a soft and damp cloth. Never spray cleaning fluid directly on the glass. The fluid may seep in and cause damage. Get rid of the dust and clean the glass to remove any stains like grease or fingerprints. A simple decision in framing will certainly go a long way in preserving the life of your art print. It truly is a small investment for a lifelong return.
Happy framing!
Copyright 2007 Edwin Mah
Edwin owns www.abstract-prints.com, an online art gallery offering more than 20,000 contemporary art prints for home and office decorating. Visit Abstract Prints for your interior decorating needs today!
Dog Health: Signs of Emergency Problems
Our dog's health is important to us. When we suspect our dog is ill, we want to do the right thing. Unfortunately, distinguishing between a minor illness and health problems that need emergency attention is not always easy. It's important to be prepared for and know how to identify serious dog health problems.
Know where to take your dog in an emergency
If your dog falls seriously ill, time wasted locating emergency services can be fatal. Know in advance where to go. Many veterinarians offer 24 hour emergency services. Find out if this includes your vet. If not, find out where the nearest veterinary emergency hospital is located. Keep this information in a convenient place.
So how do you know if you are experiencing an emergency?
Most veterinarians will advise you to not to take a chance but call the nearest emergency veterinary service if you suspect that your dog's health needs immediate attention. Staff will assess the situation and usually advise that you bring your dog in for an examination.
The following information will help you identify and respond appropriately to the most common dog health emergencies.
Severe stomach pain
Signs that your dog is experiencing abdominal pain include an abdomen that is tender to the touch, standing with their back arched, and refusing food. Take your dog to the nearest emergency veterinary service immediately. Abdominal pain can be (and often is) a sign of a serious health problem.
Other signs of abdominal distress include vomiting, whelping, shakiness and breathing difficulties. Your dog may be suffering from gastric torsion. Gastric torsion develops suddenly and rapidly and tends to affect large, heavily-chested dogs more than most. This condition needs immediate attention.
Abdominal distress may also be a sign of bloat, constipation, kidney or liver disease, urinary stones, poisoning, an intestinal obstruction or a simple tummy ache. Err on the side of caution. A visit to the emergency veterinarian is advised to safeguard your dog's health and give you peace of mind.
Control heavy bleeding
A laceration that results in heavy bleeding must be dealt with immediately. Apply direct pressure to the wound with a clean, dry bandage. Bleeding should stop within ten minutes.
With the bleeding controlled get your dog to the vet as quickly as possible. With dogs, there is only a small window of time for stitching a wound.
If the bleeding does has not stopped within twenty minutes, or if your dog is bleeding from the chest take your dog to the emergency clinic immediately.
Breaks and fractures
If your dog has had an accident and possibly broken bones, the first step is to call your regular vet. If they are unable to see your dog soon, take your dog to the emergency clinic. X-rays will determine whether or not your dog has broken bones.
Do not try to clean or straighten the wound. If you have a small dog, use pencils or pens as a splint. For larger dogs, use rolled magazines or newspapers. Place them on either side of the bone, then roll cloth or adhesive tape progressively up the splint material.
While traveling to the vet, touch your pooch's toes every few minutes to be sure circulation is normal. If they get too cold, rewrap the splint material more loosely.
Difficulty with breathing
If your dog develops breathing difficulties, don't hesitate. Take them to the closest emergency hospital immediately. Breathing problems are a sign of several health problems, many of them serious.
Vehicle accidents
When a dog is hit by a car, take him to the closest emergency clinic immediately even if he appears to have come to little harm. They may have suffered internal injuries that need to be identified and taken care of as quickly as possible. Shock can also pose a threat to your dog's health. To prevent shock, wrap your dog in a blanket.
Keep away from your dog's mouth. Dogs in pain may bite, even if they have never bitten you before.
Convulsions
Any degree of seizure is a problem. Call your veterinarian at once. If convulsions last for more than a few minutes, place a blanket over your dog, keep away from his mouth and take him to the nearest emergency service immediately.
Seizures are a sign of serious health problems including epilepsy, metabolic problems, brain tumors, and poisoning. Seizures themselves can be life threatening.
Whenever you are seriously concerned about your dog's health, don't hesitate to seek immediate veterinary advice. You know your dog well enough to know when something is seriously amiss. And you love your dog well enough not to take chances. Remember, veterinarians love animals too, and understand your concern.
Calling emergency services first will give clinic staff an opportunity to assess the situation and, if necessary, ensure that a medical team is prepared for your arrival. For further advice on emergency dog health problems, consult your veterinarian. A good veterinarian will be more than happy to help with any issue concerning your dog's health.
Best Wishes,
Colleen
Discover how you can reduce vet fees and keep your dog healthy and happy… http://dogandpuppyhealth.com/guide. Get free dog health and dog training information at http://dogandpuppyhealth.com.
How to Benefit From Detox Patches
Detoxification is now being marketed as a necessary concept to restore the body's inherent ability to keep healthy. Since toxins are abundant everywhere you go, there is really no arguing with the thought. You will probably readily fall in with this endeavor as you realize that you can benefit from detox yourself. Having combined modern technology with many traditional Asian medicine practices such as reflexology, crystal therapy, and herbalism, health companies are now peddling amazing products that have made detoxification more accessible to everybody. Detox patches are the simplest detoxification tool they are pushing so far.
Detox patches were really made to be placed on the soles of the feet, but it is all right to place them on other areas that have a more pressing need for detoxification. Foot detox patches consist of natural ingredients such as wood or bamboo vinegar and tourmaline, which has far infrared and negative ion emission properties. Together, these things cause the acupressure points on your feet to be stimulated leading to the removal of blockages in the circulatory and lymphatic systems. This makes toxins easier to discard.
Results are quickly achieved by using foot detox patches. You will feel an improvement overnight, but it is usually recommended that application be continued for a fortnight. Foot detox patches help you in:
• Toxin elimination
• Blood circulation improvement
• Immune system fortification
• Water retention prevention
• Metabolism increase
• Sleep pattern improvement
• Fatigue prevention
• Revitalization
• Pain management
The following are some things you have to keep in mind regarding the use of foot detox patches:
1. Detox patches may be applied on other areas that obviously need relief.
2. They are not to be placed on open wounds, mucus membranes, or around the eyes.
3. Foot detox patches may be used during the day, but nighttime use is more preferable.
4. To keep the foot detox patches in place while you are sleeping, wear socks over them.
5. Cover detox patches with adhesive tape when placed on areas that are active, sweaty, or curvy.
Toxin build-up is prevented with the regular use of detox patches. Remember, less toxins in the body means a stronger immune system and better overall health. Don't allow yourself to be susceptible to ailment; invest in detox patches.
Now you can improve your health through natural detox with detox foot pads! Visit http://my-foot-detox.com/ to learn how.
3M(TM) Polyester Tape 8901, 1 1/2 in x 72 yd [PRICE is per ROLL]
3M(TM) Polyester Tape 8901, 1 1/2 in x 72 yd [PRICE is per ROLL] Review
3M(TM) Polyester Tape 8901, 1 1/2 in x 72 yd [PRICE is per ROLL] Feature
- Width: 1 1/2 IN
- Length: 72 YD
- Model: 8901
- Sale Unit: ROLL
3M(TM) Polyester Tape 8901, 1 1/2 in x 72 yd [PRICE is per ROLL] Overview
Clean removing high temperature silicone adhesive and tough non-slivering polyester backing makes this tape a popular choice for powder coat paint masking. 2.3 mil (0.06 mm) total thickness.
3M(TM) Polyester Tape 8901, 1 1/2 in x 72 yd [PRICE is per ROLL] Specifications
Available at Amazon Check Price Now!
*** Product Information and Prices Stored: Feb 18, 2010 18:45:03
Taking a Look at Xyron Hand-Held Adhesives
One of Xyron's strengths is creating devices that can apply adhesive to craft projects, storyboards, posters, and other items. The company manufactures such top-selling products as the Create-A-Sticker series and they also have a lineup of professional-grade laminators for this type of use. However, as helpful as their machines are, sometimes you just need to apply a little bit of glue to a document. If that's the case, Xyron has some very convenient hand-held products you can use. Here's what they have available....
-
Adhesive Runners. Xyron Adhesive Runners are available in both 2- and 4-inch widths, and there's a smaller one with a width of 3/8". These supplies are great for applying acid-free glue to just about any medium (paper, photographs, etc.). These devices apply the bonding agent in a dotty pattern so you won't experience the wrinkling and mess that comes when you use too much glue, nor will you have to deal with the odor that comes with using spray adhesives. These products are refillable and they were designed with ergonomics in mind, so they will feel just right in your hand. These items are affordable, as well: the 2-inch one retails for $12.99, the 4-inch model is priced at $16.99, and the 3/8" runner is the cheapest of them all at $9.99. Each of these comes with 30 feet of glue.
-
Adhesive Eraser. One of the best things about Xyron adhesives, aside from them being non-toxic, is that if you accidentally use too much glue, it won't ruin your project. You can rub the excess glue away with the Adhesive Eraser. This is a product will get rid of the excess sticky stuff so your project will look great. This product is cheap, too, and is available for around $2.00.
-
Mounting Tape. This is one product that will be really helpful when you need to mount photos in a scrapbook, on a greeting card, or a piece of posterboard. Each roll has 30 feet of tape that's 1/2" wide, and this tape is acid-free. It goes for $3.99 and just about everyone who works with photographs should have a roll.
-
Magnet Tape. Xyron has a number of devices that can make magnets, such as the Creatopia and the Creative Station series. However, if you want to simplify the magnet-making process, you can use a piece of this magnetic tape. Each roll has 25 feet of magnet backing that can be easily torn so you can create your own magnets in seconds. This product is priced at $6.99.
-
Sticky Spots. Another great product for scrapbookers, Sticky Spots are essentially little pieces of really sticky tape that can be used in a wide array of craft projects. Each piece measures 3/8" and there are 200 Spots per roll. These are a great alternative to messy (and smelly) glue, and they're easy to apply. A roll of Sticky Spots costs $4.99.
If you're interested in buying one of these Xyron Adhesive Products, you should really visit MyBinding.com. They have these great items as well as a wonderful selection of Paper Handling Equipment, and they're all available at low prices. Plus, they offer free shipping on all orders over $75.00. Check it out for yourself now!
3M 00021200453854 8951 3"x72yds Blue Polyester Tape
3M 00021200453854 8951 3"x72yds Blue Polyester Tape Review
3M 00021200453854 8951 3"x72yds Blue Polyester Tape Feature
- Package Quantity: (1) 72 Yard Roll
- Masking Tape Type: Polyester Masking Tape
- Masking Tape Style: High Temperature Masking Tape
- Color: Blue
- Width (Inch): 3
- Length (Yards) (Yards): 72
- Tensile Strength (Pounds): 30
- Thickness (mil): 2.8
- Tape Number: 8951
3M 00021200453854 8951 3"x72yds Blue Polyester Tape Overview
Masking And Painters - Industrial Tape Masking Tape Type: Polyester Masking Tape Masking Tape Style: High Temperature Masking Tape Color: Blue Width: 3 Length (Yards): 72 Tensile Strength: 30
3M 00021200453854 8951 3"x72yds Blue Polyester Tape Specifications
Available at Amazon Check Price Now!
*** Product Information and Prices Stored: Feb 16, 2010 15:00:04
1/2" x 60 yds. (12 Pack) 3M - 465 Adhesive Transfer Tape-Hand Rolls
1/2" x 60 yds. (12 Pack) 3M - 465 Adhesive Transfer Tape-Hand Rolls Review
1/2" x 60 yds. (12 Pack) 3M - 465 Adhesive Transfer Tape-Hand Rolls Feature
1/2" x 60 yds. (12 Pack) 3M - 465 Adhesive Transfer Tape-Hand Rolls Overview
Double coated transfer tape is great for splicing paper, foil, corrugated and film. Apply adhesive side down so the liner can be peeled off when needed. 3" core size.
1/2" x 60 yds. (12 Pack) 3M - 465 Adhesive Transfer Tape-Hand Rolls Specifications
Available at Amazon Check Price Now!
*** Product Information and Prices Stored: Feb 15, 2010 01:25:03
Henkel 50-42912 Professional Grade Duck Tape 5 Yd Blue
Henkel 50-42912 Professional Grade Duck Tape 5 Yd Blue Review

Henkel 50-42912 Professional Grade Duck Tape 5 Yd Blue Feature
- Professional grade duct tape
- Polyethylene coated cloth tape with a high tack rubber adhesive
- High tear strength
- Repairs furniture, upholstery air conditioner covers and many other household applications
- ASTM and PSTC, 1.88" x 5 yds, Blue
Henkel 50-42912 Professional Grade Duck Tape 5 Yd Blue Overview
"ACE" PROFESSIONAL GRADE DUCK TAPEProfessional grade duct tape Polyethylene coated cloth tape with a high tack rubber adhesive High tear strength Repairs furniture, upholstery air conditioner covers and many other household applications ASTM and PSTC 1.88" x 5 yds Blue Carded.
Henkel 50-42912 Professional Grade Duck Tape 5 Yd Blue Specifications
Available at Amazon Check Price Now!
*** Product Information and Prices Stored: Feb 14, 2010 01:10:03
What You Need to Know About Sign Fixings
Have you ever heard of sign fixings? This is essentially the hardware or other items that are used to mount or stabilise signs, and this is also a term used when determining the mounting options of notice boards and such as well. Most people only think in terms of the board or the sign, without giving careful consideration to how that sign or board will be mounted, which is usually a very big mistake. Here are some things that you need to know.
- Mounting Options - This is very important in determining what type of hardware you need. There are essentially two mounting options - mounted or un-mounted. Obviously, if your sign or board will be mounted, it will be on a wall, whether that wall is interior or exterior. If it is un-mounted, however, there are various options available, such as fixed poles or posts, caster frames, or large stand-alones.
- Sign Fixings for Stabilisation - The mounting options that you choose, and the hardware used for that mounting will be greatly determined by how much stability is required, and how much stability the various options offer you. Think carefully about how much stabilisation is required, and consider where the sign or board will be mounted as well. For some mounting options, studs must be present in the wall. For other options, this won't matter at all.
- Adhesive Options - Adhesive options are very good for a number of situations. For example, if your sign or board will only be affixed temporarily, and you do not want traces of the sign or the hardware used to secure it left behind, adhesive is a great option, as long as you aren't using permanent adhesives. Two sided tape is the most common type of adhesive used in this situation. Adhesive options do not require the presence of studs.
- Screw and Bracket Sign Fixings - This is the most secure option available for affixing signs and notice boards. Screws and brackets can be used on walls with studs, or with pole mounting options as well. Of course, in the case where the mounting is being done to a wall, you should note that there will be small holes, and possibly other marks, left behind should the sign or board and the hardware be removed at some point.
- Magnetic Options - This is a popular option, because magnets can be very strong. Of course, this requires a magnetic surface, or the use of magnets and magnetic surfaces attached to a wall and the back of the sign or board that is to be placed on the wall. The best use for this option, because of this, is a surface that is already magnetised. Of course, the weight of your sign or board will also be a determining factor concerning this option as well.
While you should consider your options carefully, and know what is needed at the time that you order your sign or board, it is important to realise that you can use just about any option that you want when it comes to sign fixings, as most signs and boards are available for all fixation options.
Visit TSNN.co.uk to place a quick quote for Sign Fixings for conference, meeting and other events from display boards suppliers. TSNN.co.uk is the largest UK conference and event website and by submitting a quick quote, your requirements will be sent to multiple suppliers so that you can find various items including exhibition stands and display boards.
Tartan(TM) Box Sealing Tape 369 Tan, 48 mm x 100 m [PRICE is per ROLL]
Tartan(TM) Box Sealing Tape 369 Tan, 48 mm x 100 m [PRICE is per ROLL] Review

Tartan(TM) Box Sealing Tape 369 Tan, 48 mm x 100 m [PRICE is per ROLL] Feature
- Color: Tan
- Width: 48 MM
- Length: 100 M
- Model: 369
- Sale Unit: ROLL
Tartan(TM) Box Sealing Tape 369 Tan, 48 mm x 100 m [PRICE is per ROLL] Overview
General purpose tape. For applications where box, weight of contents, etc. does not put severe stress on the tape. Good holding power to fiberboard. Complies with environmental considerations of ASTM D1974.
Tartan(TM) Box Sealing Tape 369 Tan, 48 mm x 100 m [PRICE is per ROLL] Specifications
Available at Amazon Check Price Now!
*** Product Information and Prices Stored: Feb 12, 2010 00:40:03
3M 2090 Scotch-Blue Painter's Tape for Multi-Surfaces, 2-Inch x 60-Yard, 4-Pack
3M 2090 Scotch-Blue Painter's Tape for Multi-Surfaces, 2-Inch x 60-Yard, 4-Pack Review
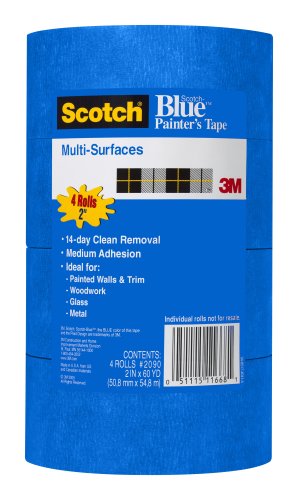
I've used this tape for YEARS. It is amongst the best on the market. The writer that had the tape peel off 3 layers of paint AND the drywall paper must have had defective drywall and/or poor prep on the previous painting jobs. The adhesive is NOT strong enough to pull all of that off after just a few hours. I've left it in place for more than a month with no problem.
3M 2090 Scotch-Blue Painter's Tape for Multi-Surfaces, 2-Inch x 60-Yard, 4-Pack Feature
- For most painted surfaces such as: painted walls, painted or finished trim and woodwork; glass and metal
- Adhesion Level: medium
- Removal Time: up to 14 days
- Coating being applied: water-based, solvent based; not compatible with lacquer coatings or surfaces
- Interior or Exterior
3M 2090 Scotch-Blue Painter's Tape for Multi-Surfaces, 2-Inch x 60-Yard, 4-Pack Overview
3M 2090 Scotch-Blue Painter's Tape for Multi-Surfaces, 2-Inch x 60-Yard, 4-Pack Specifications
Available at Amazon Check Price Now!
*** Product Information and Prices Stored: Feb 11, 2010 00:10:04
Size - 36mm x 55mm, Scotch High Performance Masking Tape 232, Adhesive Tape, 3M (1 Each)
Size - 36mm x 55mm, Scotch High Performance Masking Tape 232, Adhesive Tape, 3M (1 Each) Review
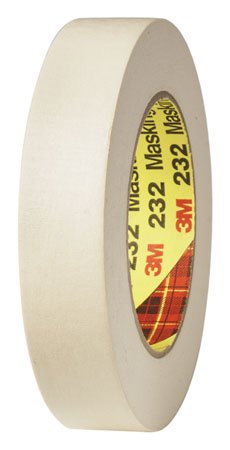
Size - 36mm x 55mm, Scotch High Performance Masking Tape 232, Adhesive Tape, 3M (1 Each) Feature
Size - 36mm x 55mm, Scotch High Performance Masking Tape 232, Adhesive Tape, 3M (1 Each) Overview
A high performance paper masking tape to be used in the medium temperature paint bake operation. A smooth crepe paper tape that is treated with a heat and solvent resistant coating.
Size - 36mm x 55mm, Scotch High Performance Masking Tape 232, Adhesive Tape, 3M (1 Each) Specifications
Available at Amazon Check Price Now!
*** Product Information and Prices Stored: Feb 09, 2010 23:25:03
8 ROLLS OF POLYESTER TAPE VT163 180 FEET LONG X 3/4 INCH WIDE
8 ROLLS OF POLYESTER TAPE VT163 180 FEET LONG X 3/4 INCH WIDE Review

8 ROLLS OF POLYESTER TAPE VT163 180 FEET LONG X 3/4 INCH WIDE Feature
- Double coated ultra high peel polyester
- Bonds to textiles, plastic and metal extrusion
- UV and heat resistent acrylic adhesive
8 ROLLS OF POLYESTER TAPE VT163 180 FEET LONG X 3/4 INCH WIDE Overview
This double coated, ultra high peel polyester tape is the perfect item to bond to textiles, plastic and metal extrusions. The acrylic adhesive has excellent UV and heat resistance. More selections available, search for them on Amazon.
8 ROLLS OF POLYESTER TAPE VT163 180 FEET LONG X 3/4 INCH WIDE Specifications
Available at Amazon Check Price Now!
*** Product Information and Prices Stored: Feb 08, 2010 22:50:03
CS Hyde Kapton (Polyimide) Film, Non-Adhesive, 1 Mil., Amber, 24" x 20 ft. Roll
CS Hyde Kapton (Polyimide) Film, Non-Adhesive, 1 Mil., Amber, 24" x 20 ft. Roll Review
CS Hyde Kapton (Polyimide) Film, Non-Adhesive, 1 Mil., Amber, 24" x 20 ft. Roll Feature
- Kapton (polyimide) film maintains excellent physical, electrical, and mechanical properties over a wide temperature range (-269F to 752F).
- Kapton (polyimide) film has excellent chemical resistance; there are no known organic solvents to the film.
- Kapton (polyimide) film does not melt or burn.
- It has the highest UL-94 flammability rating: V-0
- Kapton (polyimide) film is used in a variety of electrical insulation applications: wire and cable tapes, formed coil insulation, substrates for flexible printed circuits, motor slot liners, magnet wire insulation, and transformer and capacitor insulation.
CS Hyde Kapton (Polyimide) Film, Non-Adhesive, 1 Mil., Amber, 24" x 20 ft. Roll Overview
Kapton (polyimide) film possesses a unique combination of properties that make it ideal for a variety of applications in many different industries. The ability of Kapton to maintain its excellent physical, electrical, and mechanical properties over a wide temperature range.
CS Hyde Kapton (Polyimide) Film, Non-Adhesive, 1 Mil., Amber, 24" x 20 ft. Roll Specifications
Available at Amazon Check Price Now!
*** Product Information and Prices Stored: Feb 07, 2010 18:45:03
CST/Berger 71-Y30M Pro-Series PVC Coated Fiberglass Tapes, 30m metric
CST/Berger 71-Y30M Pro-Series PVC Coated Fiberglass Tapes, 30m metric Review
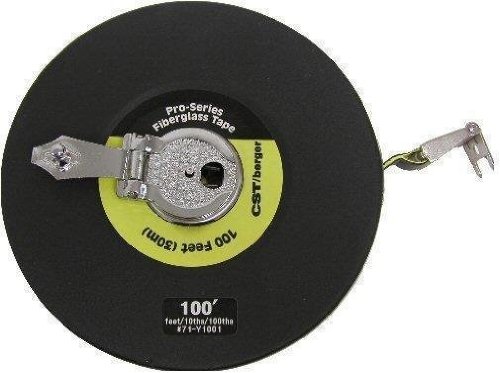
CST/Berger 71-Y30M Pro-Series PVC Coated Fiberglass Tapes, 30m metric Feature
- Pro-Series PVC Coated Fiberglass Tapes, 30m metric.
- Made with nonwoven PVC-coated fiberglass of superior durability.
- Waterproof, dirt-resistant, washable. Tough tapes--won't break even when vehicles drive over them.
- More durable than steel, more functional than cloth tape.
- Markings aren't affected by casual contact w/ alcohol, brine, thinner, gasoline or similar fluid.
CST/Berger 71-Y30M Pro-Series PVC Coated Fiberglass Tapes, 30m metric Overview
Pro-Series PVC Coated Fiberglass Tapes, 30m metric. Made with nonwoven PVC-coated fiberglass of superior durability. Markings are not affected by casual contact with alcohol, brine, paint thinner, gasoline or similar fluid. PVC face will not collect dust or mildew and stains wash off with soap and water.
CST/Berger 71-Y30M Pro-Series PVC Coated Fiberglass Tapes, 30m metric Specifications
Available at Amazon Check Price Now!
*** Product Information and Prices Stored: Feb 06, 2010 18:35:02
Scotch(R) Box Sealing Tape 375 Clear, 48 mm x 914 m [PRICE is per ROLL]
Scotch(R) Box Sealing Tape 375 Clear, 48 mm x 914 m [PRICE is per ROLL] Review

Scotch(R) Box Sealing Tape 375 Clear, 48 mm x 914 m [PRICE is per ROLL] Feature
- Color: Clear
- Width: 48 MM
- Length: 914 M
- Model: 375
- Sale Unit: ROLL
Scotch(R) Box Sealing Tape 375 Clear, 48 mm x 914 m [PRICE is per ROLL] Overview
A superior performance packaging tape used for box sealing, splicing, recooperage and other demanding packaging applications. Has a strong conformable backing with excellent edge tear and split resistance which reduce score line breaking and center seam splitting even when cartons are handled roughly. The pressure sensitive hot melt adhesive adheres to most surfaces, even cartons with high recycled content with . This time proven construction assures superior performance in a wide range of environmental applications.
Scotch(R) Box Sealing Tape 375 Clear, 48 mm x 914 m [PRICE is per ROLL] Specifications
Available at Amazon Check Price Now!
*** Product Information and Prices Stored: Feb 05, 2010 12:30:02
For Timeless Elegance, Consider Hair Replacement Wigs in Northern Virginia
Although more and more enterprising physicians are setting up shop and selling hair replacement wigs in Northern Virginia, clinics focusing on hair loss treatments are still quite few and far between. People who are at a loss for hair loss solutions find themselves traveling long distances to credible institutes - but those who make the regular trips can attest to the fact that they are trips worth taking.
Hair replacement wigs in Northern Virginia are a viable alternative to surgery or medication. You could also pursue it as a complement to surgery or medication, if the budget permits. And the best part is, any man or woman living in this area does not have to comb the state to find a competent wig-maker.
It has also become convenient to wear wigs and toupees, unlike in the old days. The adhesive tapes on hair replacement units have become so durable, a person wearing the unit no longer has to worry about his or her wig being blown off by the wind or turned askew with sudden movements. In fact, a person wearing a wig can now go and do "daring" activities such as skydiving or windsurfing without any fear of his or her hair piece flying off his or her head.
Hairpieces aren't a "wash and wear" affair, however; like regular hair, they need a lot of attention. Toupees and wigs should be cleaned regularly. The adhesive residue on the wig itself should not be allowed to build up. Adhesive residue buildup can be harmful when absorbed by the skin. Also, the chemicals in wig adhesive residue can cause irritation to the scalp and discourage rather than promote the growth of new cells in the hair follicles of the scalp. Besides being unhygienic, just think of how you'll look wearing a dirty wig! You'll be defeating the purpose of purchasing a hairpiece in the first place.
There are quite a few men and women who nonetheless look askance at the idea of wearing wigs. Abundant hair growth has always been associated with beauty and good self-image, not just with women but with men as well. The fear of being found out that one is wearing a wig can sometimes cause so much anxiety, so much that it hinders the formation of new relationships and strains existing ones. Wearing wigs can also become uncomfortable.
For the moment, hair replacement wigs in Northern Virginia are among the more popular options for people suffering from hair loss. But all one has to do is to keep an open mind, and more options shall be available.
Newhairlosssolutions.com provides you with info on hair replacement wigs in northern virginia and much more, come take a look at http://www.newhairlosssolutions.com/
How To Use Adhesive Tape - 9 Unusual Ways
Did you know that a band-aid is simply small squares or circles of sterile gauze stuck onto adhesive tape and then covered with crinoline? Necessity is the usually the mother of inventions and so it was with the band-aid. We can thank Earl Dickson for it or perhaps Johnson & Johnson should do it.
- To remove a splinter - Ever get a splinter that was too tiny or too deep to get out with a pair of tweezers? Well, forget the needle. Instead, put some adhesive tape over the splinter and leave it on for 3 days. By the third day, pull off the tape and the splinter will come out with it (usually).
- To Stop Ants - Scout ants are always looking for that next great cookie jar or candy box lying around. One of the best ways to stop the ants is by surrounding your cookie jar or candy box or whatever with double-sided adhesive tape. Just make sure one side is sticky-side-up.
- To remove lint - who needs to buy a lint remover? You can lift lint and pet hair off clothing and furniture by wrapping your hand with adhesive tape - sticky-side out. Works like a charm.
- To shrink your hat size - your hat's too big so wrap adhesive tape around the sweatband in two or three layers till it fits. Sweat absorption will remain the same or improve.
- To clean a comb - get rid of the hair and gunk that has built up in the teeth of your comb by pressing a strip of adhesive tape along the length of the comb and then lifting it off. Dip the comb in an alcohol and water solution or ammonia and water and let it dry. Voila!, clean comb.
- To cover casters - stop your furniture from leaving marks on your floor by wrapping the caster wheels with adhesive tape or placing pieces of adhesive tape at the bottom of each leg of your furniture (if you don't have caster wheels on your furniture).
- To hang your glue bottles or caulking tubes - cut a strip of adhesive tape or duct tape several inches long and fold it over the bottom of each tube so you have a flap at the end of each tube. Punch a hole in the flap with a paper-punch and hang the tubes up on nails or hooks over your workbench.
- To remove broken window glass - to avoid getting cut, criss cross both sides of a broken window pane with adhesive tape before taking off the sash. Wear heavy leather gloves when you pull the glass shards out of the frame.
- To improve your tool handle grips - overlap each wrap by half a tape width and use more than one layer. Do this with screwdriver handles, wooden hammer handles, and even hacksaw blades to create a mini-hacksaw for small unreachable locations.
Bruce Santucci lives in Melbourne, FL and has been a handyman for 25 years around the homes he has owned. To read more of his 'How To' tips and articles, visit his website at http://www.much-how.com
Duct Tape - The Ultimate Material
Duct tape is most often used in situations that require a strong and flexible adhesive. Men call it "the ultimate material" and they love it. Men get excited just talking about how duct tape. They think it is awesome and find it useful for repairing almost anything at a minimal cost.
In recent years duct tape has become available in a variety of colors. The colors broaden the spectrum of duct tape uses. Colors range from florescent to bold to pastel. There is even a foil color duct tape. Now, duct tape can not only be used to repair things, it has also become a great tool in home décor and to create a variety of gifts.
Recently, duct tape wallets have become extremely popular. They are available in many different colors and styles. To add to the fun, Duct Tape books have been written with humorous uses for duct tape as well as instructions on how to use duct tape to make all kinds of things. As stated in the Jumbo Duct Tape Book, "One rule can get you through life. It if ain't stuck and it's supposed to be, duct tape it."
The newest item in the range of gifts are duct tape roses. What a fun way to send your favorite guy flowers. Duct tape flowers won't wilt, don't need watering, and don't even need sunshine to stay fresh as the day they arrive. Plus, they are made of the most ultimate guy material available.
If you are stumped about finding a unique gift for the special man in your life, you can't go wrong with Duct Tape products!
Visit http://www.abernook.com for unique gift ideas.
3M 00021200028540 232 1"x60yd Hi-perf 3m Masking Tape
3M 00021200028540 232 1"x60yd Hi-perf 3m Masking Tape Review
3M 00021200028540 232 1"x60yd Hi-perf 3m Masking Tape Feature
- Package Quantity: (1) 60 Yard Roll
- Masking Tape Type: Tape
- Masking Tape Style: High Performance Masking Tape
- Color: Tan
- Width (Inch): 1
- Width (mm): 24mm
- Length (Yards) (Yards): 60
- Length Meter: 55
- Tensile Strength (Pounds): 27
- Tape Number: 232
3M 00021200028540 232 1"x60yd Hi-perf 3m Masking Tape Overview
Masking And Painters - Industrial Tape Masking Tape Type: Tape Masking Tape Style: High Performance Masking Tape Color: Tan Width: 1, 24 mm Length (Yards): 60 Length Meter: 55 Tensile Strength: 27
3M 00021200028540 232 1"x60yd Hi-perf 3m Masking Tape Specifications
Available at Amazon Check Price Now!
*** Product Information and Prices Stored: Feb 01, 2010 09:40:03